
How to deploy Uptime Kuma (Docker Container)

Here is a quick overview with the basic steps how to deploy Uptime Kuma on a Ubuntu server running Docker.
Uptime Kuma is a fancy self-hosted monitoring tool which you can host yourself as a docker container.
Before you start make sure you have access to a device with a docker engine running and an account with sufficient privileges.
Check out these sources for more information, requirements and instructions:
Source: https://github.com/louislam/uptime-kuma
Documentation: https://github.com/louislam/uptime-kuma/wiki
WWW: https://uptime.kuma.pet/
Start with an updated OS
Our target is virtual machine with Ubuntu Server version 22.04.4 LTS installed.
It is always a good idea to start with an up to date operating system so the first step will be updating/upgrading this machine with the latest patches.
sudo apt-get update /
sudo apt-get upgrade
Create volume folder
Create a folder for the volume that Uptime Kuma will use to store its data:
sudo mkdir -p /data/dockerdata/uptimekuma/dataDownload image and deploy container
Now download the Uptime Kuma docker image and deploy the Uptime Kuma container:
sudo docker run -d --restart=unless-stopped -p 3001:3001 -v /data/dockerdata/uptimekuma/data:/app/data --name uptime-kuma louislam/uptime-kuma:1👇 Example output 👇
techfossa@techfossa-demo-01:~$ sudo docker run -d --restart=unless-stopped -p 3001:3001 -v /data/dockerdata/uptimekuma/data:/app/data --name uptime-kuma louislam/uptime-kuma:1
Unable to find image 'louislam/uptime-kuma:1' locally
1: Pulling from louislam/uptime-kuma
8e208ccce385: Pull complete
d4781d947d98: Pull complete
da1998da34c0: Pull complete
2bf5a632d8e4: Pull complete
5bc7dff3aaf3: Pull complete
2fa455cae2bf: Pull complete
b09759921de7: Pull complete
ef94e1d893c1: Pull complete
1957dcecc453: Pull complete
1dd5af03256d: Pull complete
4f4fb700ef54: Pull complete
0e893e9bc55f: Pull complete
Digest: sha256:96510915e6be539b76bcba2e6873591c67aca8a6075ff09f5b4723ae47f333fc
Status: Downloaded newer image for louislam/uptime-kuma:1
16e87c5044e1d7f0b235027a86adb02057c433c2856802f0aac7173a09ab7d7f
techfossa@techfossa-demo-01:~$
That output looks promising, now let's check if the Uptime Kuma container is created and running:
sudo docker ps👇 Example output 👇
techfossa@techfossa-demo-01:~$ sudo docker ps
CONTAINER ID   IMAGE                           COMMAND                  CREATED         STATUS                   PORTS                                                                                            NAMES
16e87c5044e1   louislam/uptime-kuma:1          "/usr/bin/dumb-init …"   2 minutes ago   Up 2 minutes (healthy)   0.0.0.0:3001->3001/tcp, :::3001->3001/tcp                                                        uptime-kuma
730e9777e166   portainer/portainer-ce:latest   "/portainer"             10 days ago     Up 13 minutes            0.0.0.0:8000->8000/tcp, :::8000->8000/tcp, 0.0.0.0:9443->9443/tcp, :::9443->9443/tcp, 9000/tcp   portainer
techfossa@techfossa-demo-01:~$
The first real application/service on our demo host seems to be running! Now we can open the Uptime Kuma web interface, in this case on http://10.5.0.136:3001/
Your browser might give a warning since the connection to the Uptime Kuma webinterface is not encrypted with TLS/SSL.
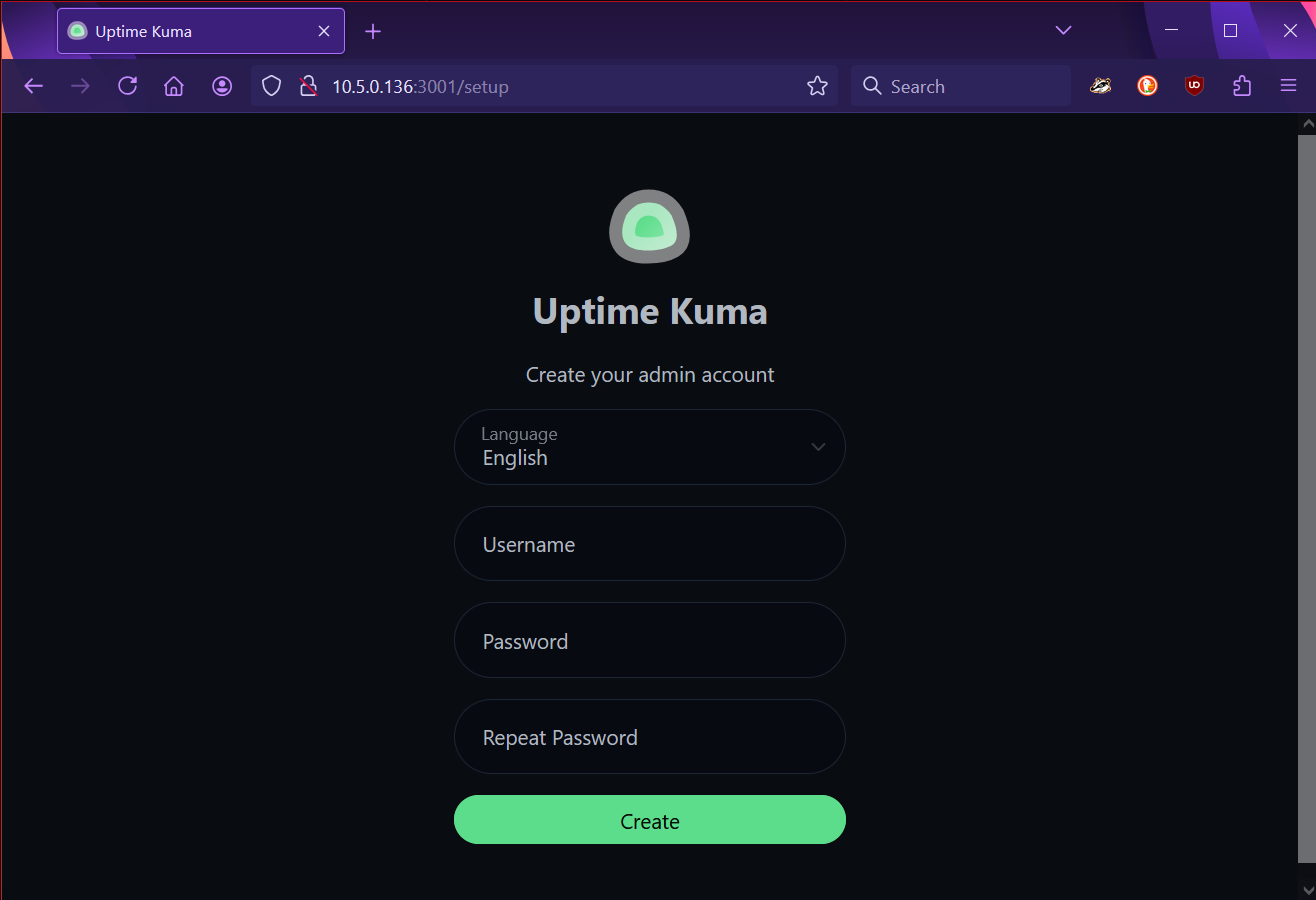
You should be seeing something like the image below and you can now choose a language and create a username and password and click the create button:
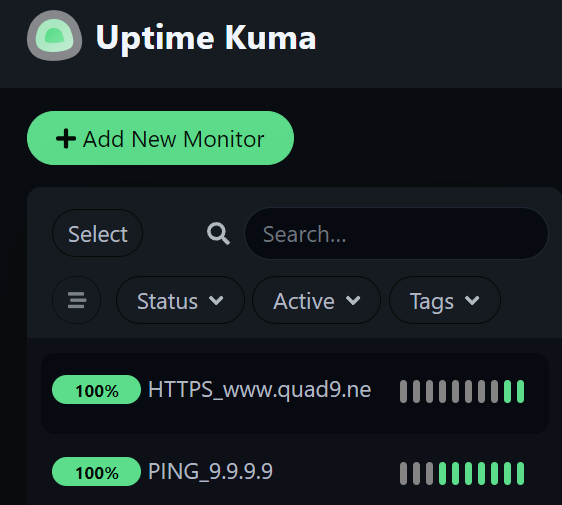
In this example we create two basic Monitors to check internet connectivity. A ping to an IP address and a https request to a website.
For the PING Monitor:
- click on the green + Add New Monitor button and continue under Add New Monitor > General
- under Monitor Type select Ping in the drop down menu
- under Friendly Name enter PING_9.9.9.9
- under Hostname enter 9.9.9.9
- click on the green Save button on the bottom of the Add New Monitor section
For the HTTPS Monitor: - click on the green + Add New Monitor button and continue under Add New Monitor > General
- under Monitor Type select HTTP(s) in the drop down menu
- under Friendly Name enter HTTPS_www.quad9.net
- under URL enter https://www.quad9.net
- click on the green Save button on the bottom of the Add New Monitor section
This is just a basic introduction to Uptime Kuma. As you problably saw their are quite some options per monitor. Exploring which options are usefull for your individual monitoring needs will take some time.
Without diving too deep into Uptime Kuma let's create a simple status page containing the two monitors we created.
Create a new Status Page:
- click on Status Pages on the top of the page at the right and continue under Status Pages
- click on the green + New Status Page button and continue under Add New Status Page
- under Name enter Internet Connectivity
- under Slug enter internet-connectivity
- click on the green Next button on the bottom of the Add New Status Page section
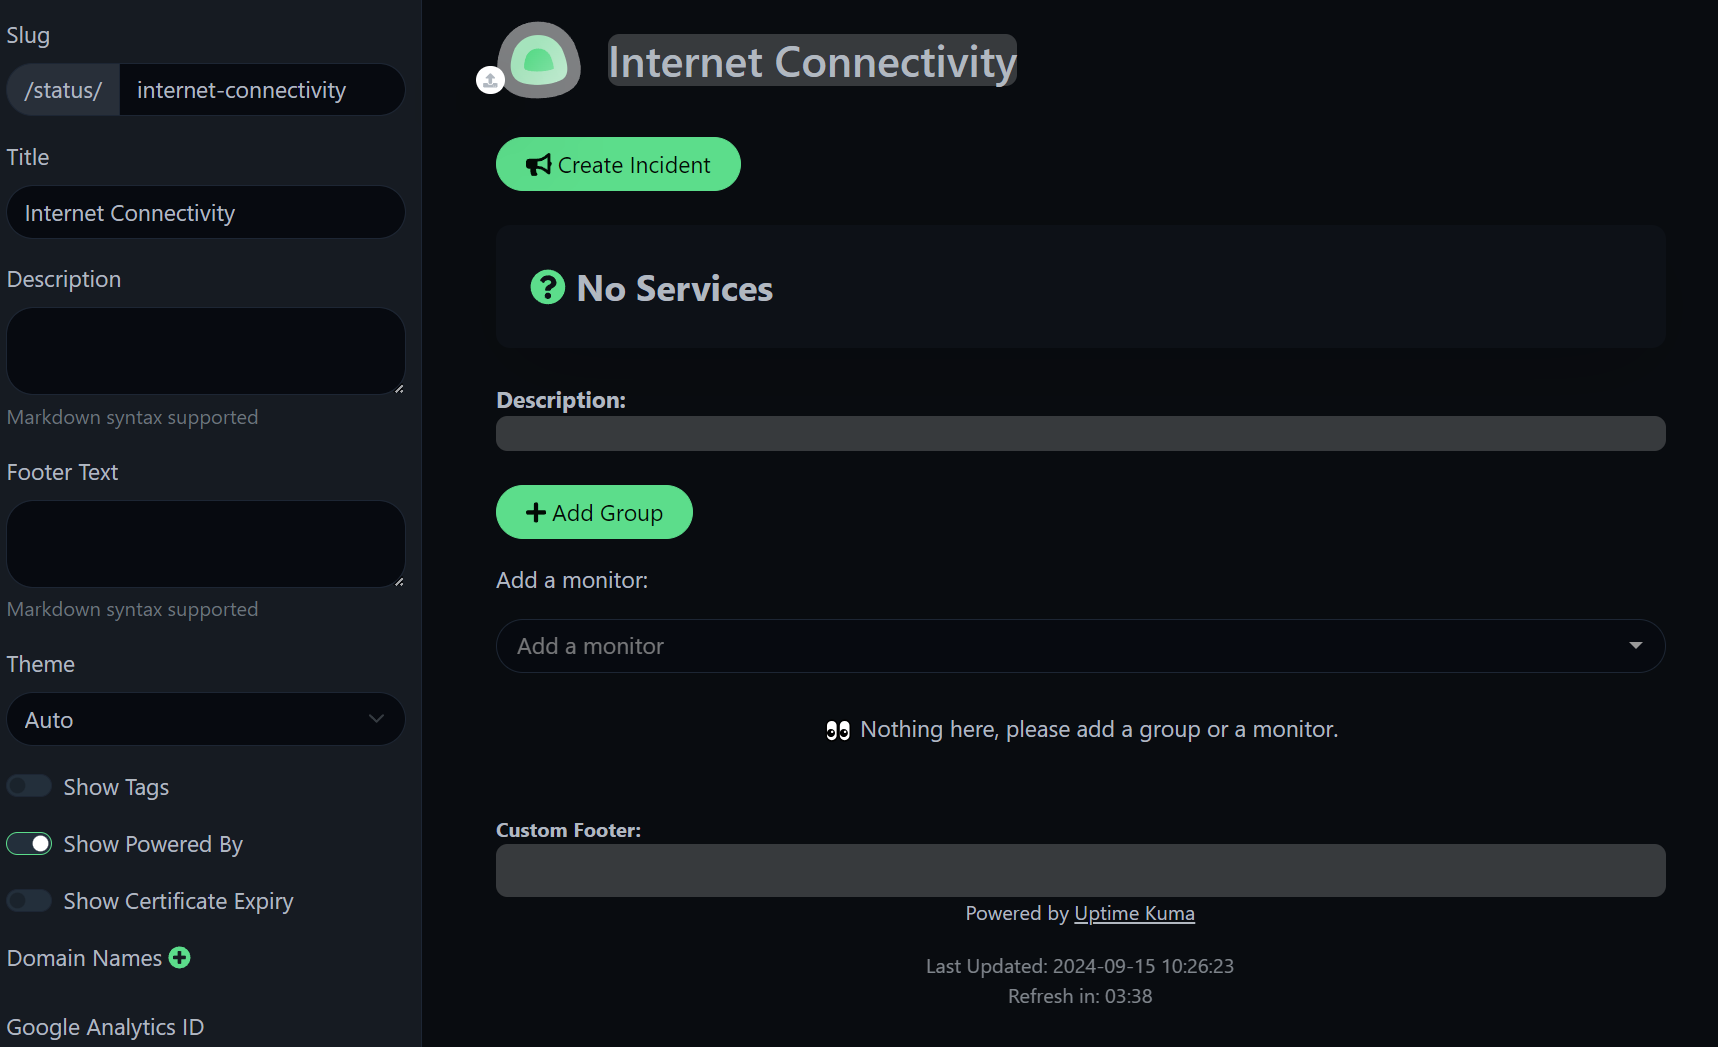
Now let's add two groups by clicking on the green + Add Group button and enter PING and HTTPS. Just click on the text Untitled Group to edit this.
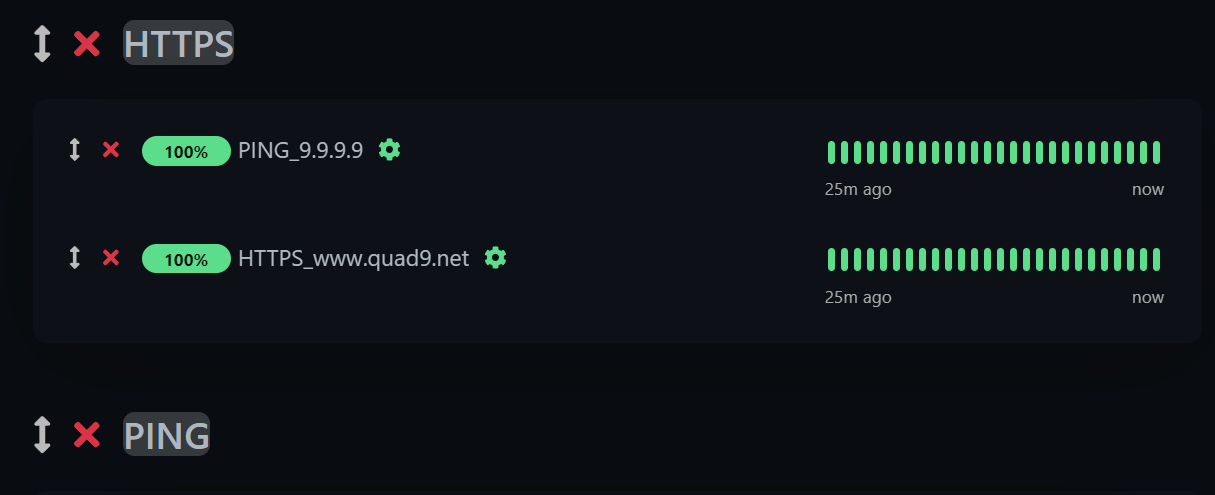 Now drag the Monitor to the correct Group using the up/down arrow. That's it for now.
Click on the green Save button on the left bottom of the page.
You should now have a working Status Page. This is just a basic page, there are still some settings to explore an tweak to your needs.
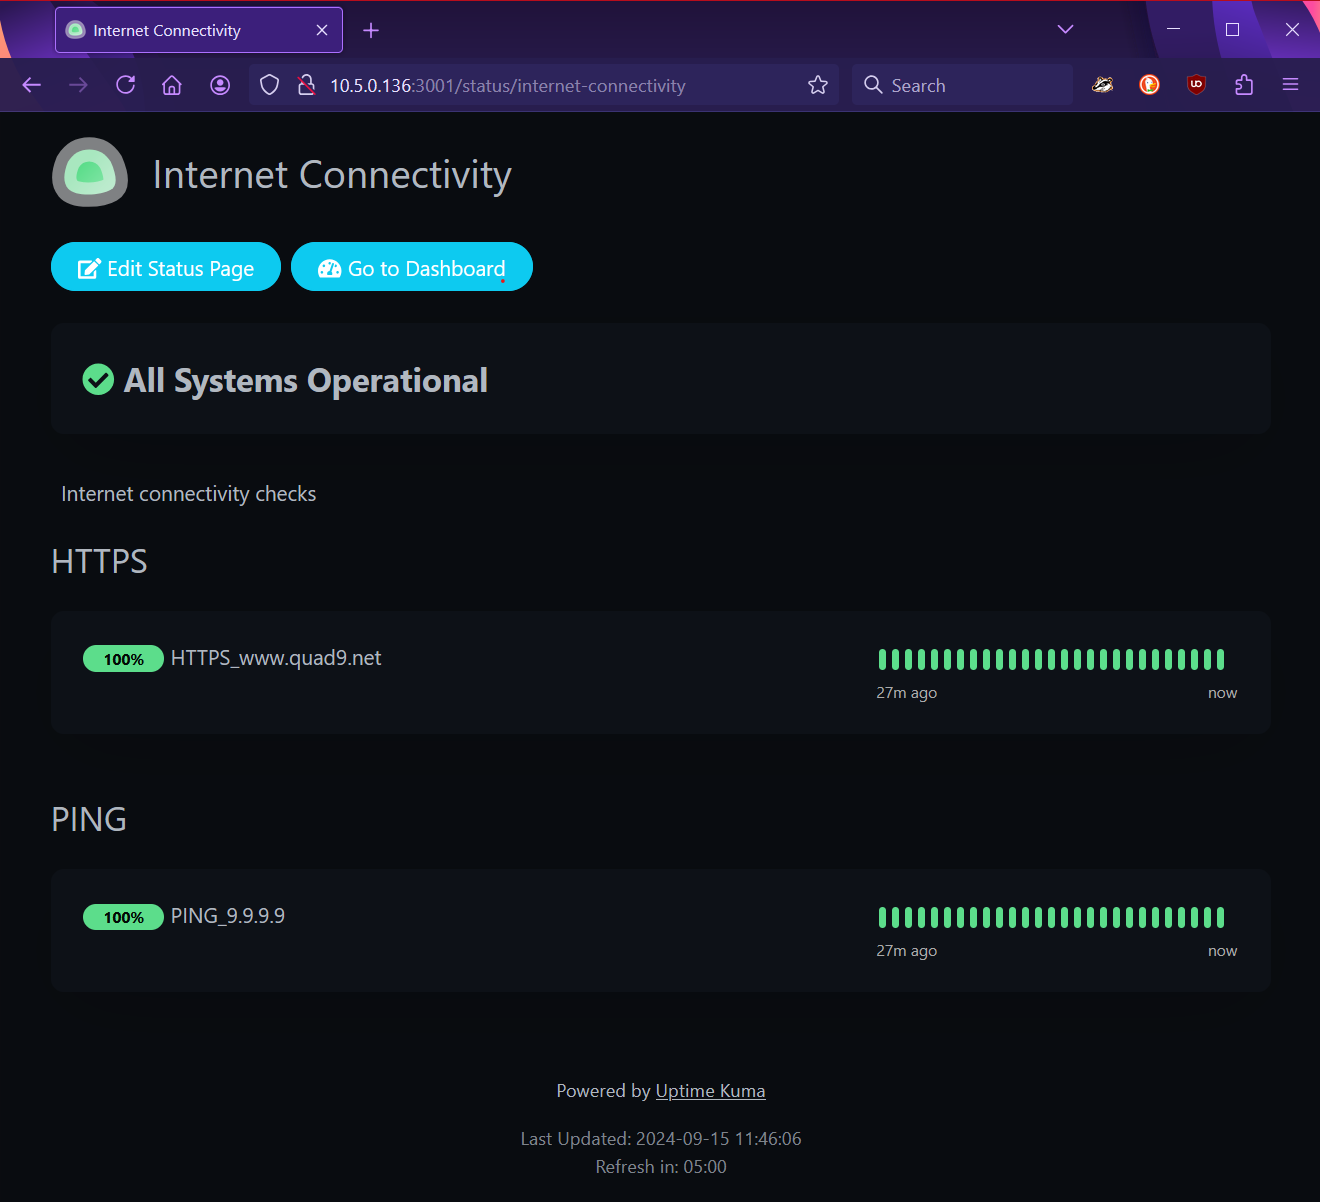
There are also loads of Settings to tweak to your wish.
Have fun exploring and using Uptime Kuma!